Using OpenID Connect with Auth0
A step by step guide to achieve single sign on
OpenID Connect SSO walkthrough
Using a federated login in Sitevision has never been this simple. OpenID Connect is a authentication protocol built upon the authorization framework OAuth 2.0. The JSON structure of OpenID Connect is more efficient than the XML format used by SAML 2.0 and consumes less bandwidth. Here's the guide to get you started.
Auth0 is a universal authentication & authorization platform. It can be used as a middleware between Sitevision and backing identity providers such as Facebook, Github and Linkedin.
Prerequisites
- An active plan at Auth0
App registration
First of all you need to register your Sitevision web site as an "app" in the Auth0 Dashboard. Head over to https://manage.auth0.com/dashboard and login with your credentials.
Start off by creating a new Application
- Click on "Create application"
Fill out the form
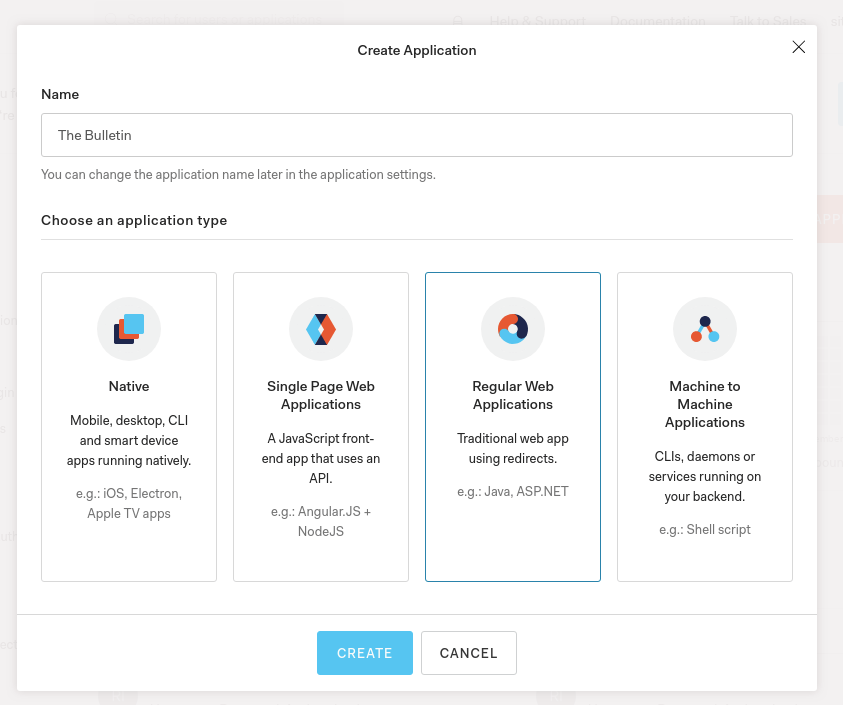
- Give the project a friendly name. Example: The Bulletin
- Choose to create a "Regular Web Application"
- Click "Create"
Choose your friendly name wisely. This name will be presented to the user when the app ask for permission to login as the user
App configuration
Now that your app has been registered you need to customize it and collect some data. Remember to save your settings as we go along.
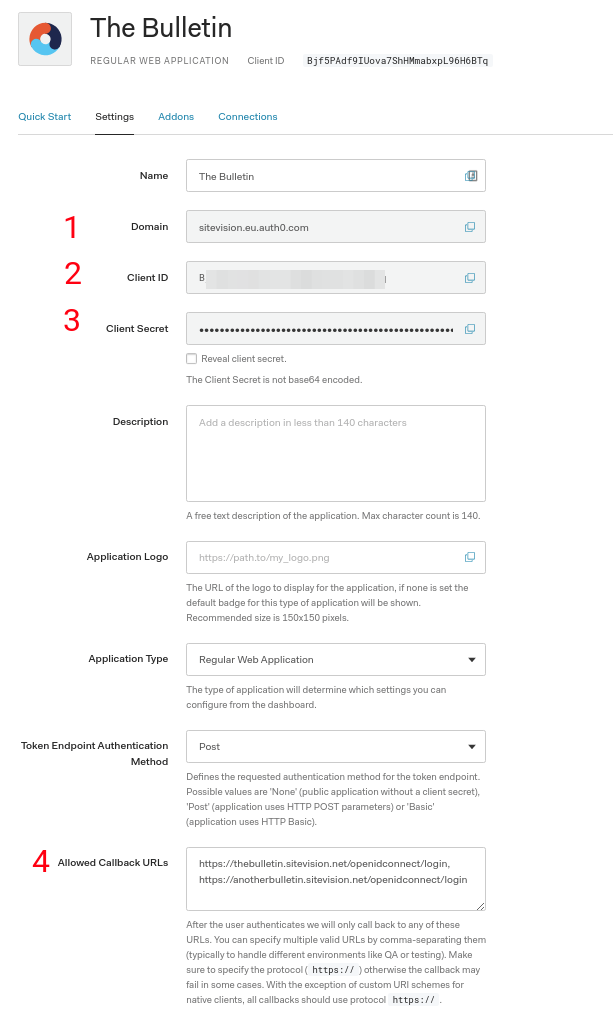
- Copy and store the Domain for later user
- Copy and store Client ID for later use
- Copy and store Client Secret for later use
- Add allowed callback URLs. The callback URLs to be entered must follow a very specific format. The format is https://<YOUR_DOMAIN>/openidconnect/login. Replace <YOUR_DOMAIN> with your domain. Example: https://thebulletin.sitevision.net/openidconnect/login
- Don't forget to save the settings
If you have any secondary domain names on your Sitevision web site, add them here as well. Example: https://anotherbulletin.sitevision.net/openidconnect/login
Sitevision settings
Filter configuration
Add an OpenID Connect authentication filter to your web site.
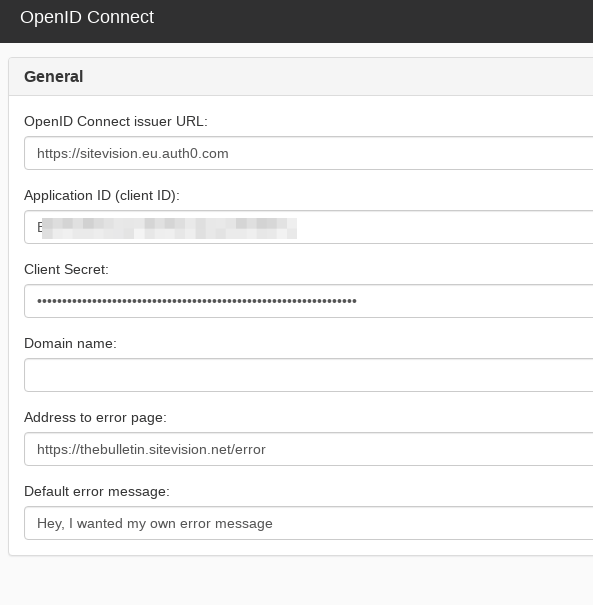
Add the following properties:
- OpenID Connect issuer URL: https://<AUTH=_DOMAIN>. Example: https://sitevision.eu.auth0.com
- Application ID: Paste the client ID from previous steps
- Client Secret: Paste the client secret from previous steps
Login module
Add an OpenID Connect login module to your web site.
- Set the control flag to 'Sufficient'.
- Make sure the module precedes the 'LDAP login module'
No further settings is needed. Now it's time to visit your web site.
Test the login flow
When visiting a page that is not public, the user is redirected to Google. The user is asked to login, if not logged in already. The user is presented with a consent screen at the very first login. Permissions is requested for the app with the name as specified earlier. Example: The Bulletin.
After consenting, the user is redirected back to Sitevision.
Everything is done, enjoy the single sign on experience!
Do you want to subscribe to News from Sitevision Developer team? Subscribe here!